

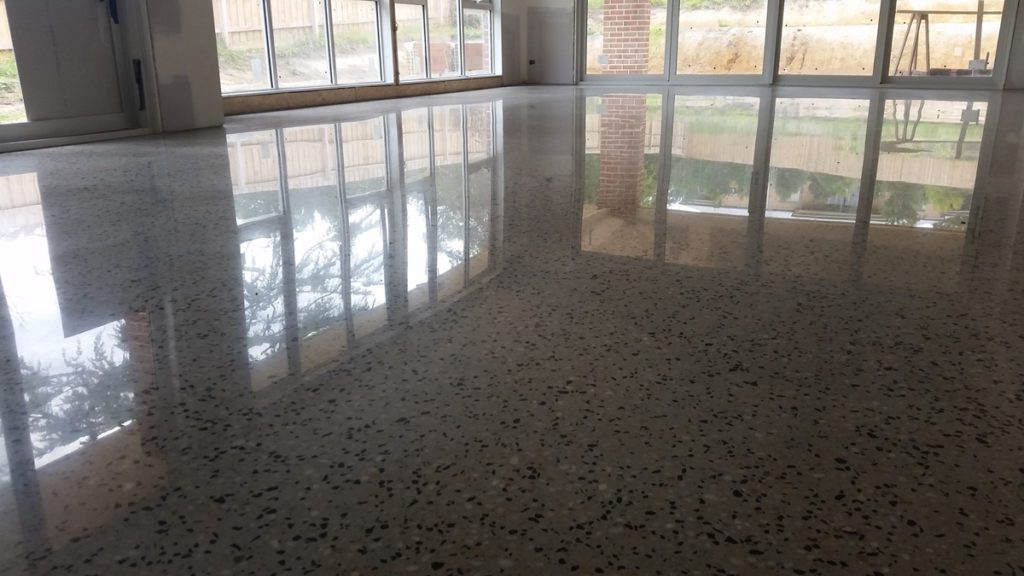
How to Hone Concrete Floors and Achieve Consistent Results
A concrete floor with a soft, continuous sheen doesn’t happen by accident. It’s the result of honing, a controlled process in which even a rushed or skipped step can leave visible swirl marks, patchy gloss, or a surface that wears unevenly before you even realise what’s happening.
Whether you want to start your DIY project or need a better understanding of what a contractor should be doing on site, knowing how to hone concrete properly is essential. It also makes it easier to judge the quality of the finished floor so you can see whether the contractor’s work, or yours for that matter, was up to the mark. Here’s a breakdown of what honed concrete actually is, how professionals handle this process, and what you’ll need if you want to do it yourself.
What Is Honed Concrete?
Honed concrete is concrete flooring ground down with fine diamond abrasives until it reaches a high-gloss finish. The result sits between a raw ground slab and a mirror-finish polished floor, with a smooth, low-sheen surface that usually has a matte-to-satin finish.
You get a flat, even texture underfoot, and because honing opens the surface more than full polishing does, the concrete often shows colour variation within the slab for a natural, stone-like look. This is why honed concrete has been a popular choice for Melbourne homes for quite some time, and you can even see it in cafes and retail spaces where an understated finish suits the overall design.
How Does the Concrete Honing Process Work?
Honing follows a distinct sequence, with each stage building on the last. Skipping even one stage can show up as premature wear or visible lines once you start using the floor regularly.
Surface Preparation and Initial Assessment
Professionals start by assessing the slab for cracks, moisture levels, existing coatings, and flatness before they start grinding. Professionals must remove old sealers, paint, or glue residue first, since grinding over contaminated concrete interferes with the diamond tooling and produces uneven cuts. This initial stage also determines how much material must be removed to achieve a consistent surface finish.
Diamond Grinding
Grinding starts with coarse diamond segments to level the slab and expose its surface, then moves through finer grits. To create a honed finish, the process has to stop in the mid-range grits (roughly 200 to 400) rather than moving to fine grits for high-gloss polishing. Every pass has to be even across the entire floor because rushing one spot creates visible grinding lines.
Grouting and Surface Refinement
Grinding often exposes air pockets, small pits, and hairline cracks that are normal for any concrete work. A cement-based grout is worked into the surface to fill these gaps, then ground back once the surface cures. This is what gives a honed floor its flat, consistent finish.
Sealing the Honed Concrete Surface
Towards the end, the professional applies a penetrating sealer or densifier to harden the surface and reduce its porosity. A good penetrating sealer penetrates the concrete slab rather than forming a film on top of it, so it won’t yellow or peel with increasing foot traffic. Since this is the last stage, it’s typically where you’ll lock in the final sheen level, so confirm with whoever’s doing the work what finish you can expect.
How to Hone Concrete Floors: A Step-by-Step DIY Guide
If you’re dealing with a small slab, you can hone it yourself with the right equipment and effort. Here’s a step-by-step overview of what the DIY process involves:
Step 1: Inspect and Prepare the Surface
First, clear the room and check the slab for cracks, uneven spots, or old coatings. Use a suitable stripping product or a coarse grinding pass to strip existing sealer or paint and patch any deep cracks before you start.
Step 2: Pre-Grind or Level the Concrete Slab if Needed
If the slab has an uneven surface or adhesive residue, use a coarse metal-bond diamond grinder to level it out. This is where you’ll be facing a lot of dust, so attach a dust extraction system to the grinder if you’re working indoors.
Take your time here, since any unevenness from this stage will still be visible once you’re well ahead into the finer grits. Also, check the floor with a level or straight edge as you go, since high and low spots get harder to correct once you reach the finer grinding stages.
Step 3: Hone the Surface Using Finer Abrasives
Work through finer resin-bond diamond pads, starting at roughly 100 grit and moving up through the 400 range, to achieve a honed finish. Avoid staying in one spot for too long; keep the grinder moving in overlapping passes. Between grits, keep sweeping and inspecting the floor under bright, raised light to spot missed patches.
Step 4: Seal and Protect the Honed Surface
If you’re happy with the texture, apply a sealer or densifier, and follow the manufacturer’s drying time and coverage rate. Two coats are standard practice, along with light sanding or buffing if the product recommends it. Try not to rush the drying time, as it’s a common reason a DIY honing project looks patchy.
Step 5: Maintain Your Honed Concrete Floor
Honed concrete is low maintenance, but it still needs some care. Make it a habit to sweep or dust-mop the floor regularly to prevent grit from accumulating on the surface. Use a pH-neutral cleaner instead of harsh chemicals, and reseal the concrete every few years, depending on foot traffic. If you can, place furniture pads under table and chair legs to keep the finish looking new.
What Materials Are Needed for Honed Concrete?
Besides having the right equipment, the right materials decide how well your honed concrete will turn out. Here are the essentials to keep handy before you begin:
Honed Aggregate
If you’re pouring a new slab for a honed finish, the aggregate mix is important. Use a well-graded aggregate with a balanced mix of stone sizes for more even exposure once the slab is ground back.
Base Materials
A stable base under the slab prevents cracking and movement later on. Skimping here is another common mistake people make that can ultimately become one of the more expensive fixes after a floor has been honed and sealed. Repairs here usually mean grinding back into a finished surface. To avoid that, stick to a properly prepared base. That will also reduce the risk of shrinkage cracks appearing months after the process.
Formwork
Solid, accurately levelled formwork is a must for new pours because it keeps slab thickness consistent and helps avoid low spots that require extra grinding later.
Adhesive or Resin
If cracks or joints need filling before grinding, a two-part epoxy or polyurethane resin is the best option. Some people use a cement-only patch, but resin bonds more reliably and grinds back to a more seamless finish, so the concrete gets the flatter surface you want.
Concrete Sealer
A breathable sealer should match the slab’s exposure, that is, whether it’s indoor or outdoor, and whether it will receive residential or commercial foot traffic. The wrong sealer can trap moisture underneath the concrete or degrade from UV exposure.
Frequently Asked Questions (FAQs)
What equipment is needed to hone concrete?
At a minimum, you’ll need a diamond grinder with interchangeable resin and metal-bond pads across different grit levels, a dust extraction system, and application tools for sealer and grout. Larger concrete work usually requires planetary floor grinders, which professionals have, and most homeowners don’t.
What concrete surfaces can be honed?
Many structurally sound concrete slabs can be honed, including new pours, older floors, and certain outdoor areas, as long as they’re thick enough to withstand heavy grinding and free of major structural cracks.
How does concrete honing differ from polishing?
Both use the same grinding equipment and process, but polishing continues through finer grits to produce a highly reflective surface. Honing stops earlier to achieve the matte-to-satin finish.
What grit should you use to hone concrete?
Honing usually finishes somewhere in the 200 to 400 grit range, depending on the level of sheen you want. The lower you go in that range, the flatter the matte surface will look, while the upper end starts to produce a slight satin shine.
How long does concrete honing take?
Most professional crews may be able to finish an average residential room’s honing job within a day or two, including the sealer’s drying time. If you do it yourself, the process can take longer due to equipment limitations and the extra passes you might need as a first-timer to correct uneven grinding.

0 comments
Write a comment